mercoledì 31 marzo 2021

With brave wings she flies by Michelle Burnier


  Hello and welcome back!  It's Michelle here from made by michi sharing a super cute card and tutorial with this absolutely adorable little girl, Flowers Gem.  Isn't she just the sweetest?!  I love that with all of the images in the Etsy shop you get 2 different versions - one is a blank canvas for you to colour and the other is already coloured for you...and may I say they are coloured amazingly!  So I am definitely taking advantage of the pre-coloured ones.

For my card today I wanted to keep it fairly simple, to keep all the focus on this sweet girl.  To start I printed off my image and cut it out using my Brother Scan N Cut.  The Scan N Cut is a life saver if you are not a fan of fussy cutting, which I am not. I then set her aside and did a bit of ink blending.  I grabbed a light shade of distress oxide ink, a blending brush and a piece of mixed media paper and started to lightly blend from the bottom right corner and upwards, concentrating more towards the bottom and fading up but not going right to the edges.

I then sprayed the inked paper with some water using my Distress Sprayer.  It adds a kind of sporadic water droplets.....some big, some small and kind of random and it lifts the ink where the water fell leaving spots of white.  It is kind of hard to see in my photos, as the ink is a bit light but they are there.

To add more interest to the background I grabbed a white and a black watercolour pan and added some small flecks of paint to it.  I did the white first and hit it with my heat gun to speed up the drying time and then the black. Again the white flecks are hard to see but they are there. 
 
 
I then added it all to my card base including my sentiment using some craft foam.  To add the finishing touch I grabbed my box of sequins and chose a few clear droplets to finish it off.  These are the perfect little touch to it.....kind of like water droplets on the flower petals.


I hope you have enjoyed my card for today.  This is such a sweet image and I really enjoyed working with her.  If you haven't already, head on over to Sabrina's Etsy shop and grab yourself one of the beautiful image and start creating something magical!  She has some really cute ones to pick from!

 I thank you very much for stopping by today and I hope you have a wonderful day,  Michelle 💗


Supplies used:

  • Flowers Gem digital image
  • Silhouette Studio 
  • HP DeskJet 3750 printer
  • Brother Scan N Cut
  • Canson Mixed Media paper
  • Ranger Distress Oxide - Tumbled Glass
  • Taylored Expressions blending brush
  • Neenah Solar White 80lb cardstock
  • Gansai Tambi 36 pan watercolour set - black and white
  • Winsor & Newton 111 paintbrush
  • Tim Holtz Distress Sprayer bottle
  • Pretty Pink Posh clear droplets
  • white craft foam
  • Art Glitter glue
  • misc white card base


mercoledì 24 marzo 2021

You Saved The Day by Marj Banzales


Hi everyone! Today, I will be sharing how I made this beautiful card using this cute digital stamp Captain America.

First, I printed the colored image and fussy cut it.


Next, is to make my background. I used a 4 x 5.25 inches White Cardstock, Distress Oxide Chipped Sapphire, Scrapbook.com Black Hybrid Inkpad, blending brush and finger protectors. 


To make the background, I first used Distress Oxide Chipped Sapphire blend it all around the paper using light hand to make sure an even amount of pressure and application of the color. I mostly focused and add more color on each corners and left the center with some light color.Then, I  added the Scrapbook.com Black Hybrid Inkpad on all sides to achieve the night sky effect.


Then, using White Watercolor and a little of bit of water and a small brush, I splatter it all over my background with the flicking motion in order to achieve the night sky.


Now, to assemble the card, I cut a piece of 4.25 x 5.5 inches Kraft Cardstock as my card panel. Then added some glue on the back of my card base and attached it to the card panel. To add dimension, I added some foam dots on the back of my digital image then attached it to card front. For the sentiment, I used My Favorite Things Superhero Stamp Set, I stamped the You Saved The Day on a piece of White Cardstock using Scrapbook.com Black Hybrid Ink pad and added to a Black Cardstock for a little lift.


Here's my finished card.


 I hope you learn a thing or two on this tutorial. Don't forget to visit CasettaSullalbero's Website and check out her amazing designs.

You can also visit my Blog Handmade | MarjBanzalesDesigns (wixsite.com) for the same post. Check out as well my Instagram and Facebook Page

I hope you enjoy my tutorial. See you again next time for another tutorial or card share here on the blog.


sabato 20 marzo 2021

Cumulative march 2021


Ciao Chicchine!! Siamo giunti al 20 marzo e, come ogni 20 del mese, vi teniamo compagnia con il post cumulativo! 
Rossella, Michelle e Marj ci deliziano con meravigliose card con protagonista Chicca Moon

Hello Chicchine !!  We have reached March 20th and, like every 20th of the month, we keep you company with the cumulative post!
  Rossella, Michelle and Marj delight us with wonderful cards starring Chicca Moon


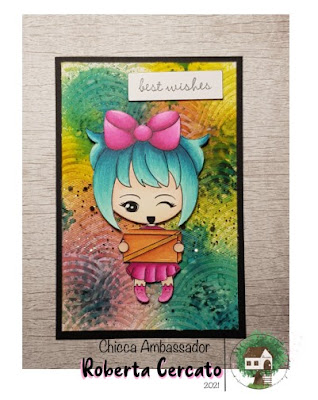
Simonetta e Roberta ci regalano una meraviglia per gli occhi con la generosa Chicca Gift

Simonetta and Roberta give us a marvel for the eyes with the generous Chicca Gift


Claire ci regala una card a dir poco stupenda con uno sfondo meraviglioso e con protagonista Dolce cappuccetto rosso

Claire gives us a card that is nothing short of wonderful with a wonderful background and starring Dolce cappuccetto rosso


Il Cieco Fuffo di Diana ci fa brillare gli occhi con Biancaneve cute


Non vediamo l’ora di vedere le vostre creazioni con i timbri firmati “ la casetta sull’albero di Chicca”
We can't wait to see your creations with the stamps signed "Chicca's tree house" 

venerdì 19 marzo 2021

Let it Snow by Sharon

 Good morning! I am Sharon, I am so pleased to be here, this is my first post and I am going to show you how I made this card using the cute little Silvia Snow:


We are still having snow here in the USA so I thought it very topical still!

I started my card by printing out Silvia onto stamping card, I chose Copic Markers to color her and used an oval die to cut her offset:


Next I matted an A7 card base with some snowflake papers.


I added my image and dusted her snowflakes with glitter.


I decided to add more snowflakes so cut these using dies and glittered them also


My finished card is so sweet.


Supplies used:
- Digital Image: Silvia Snow
- Stamping Card
- White Heavy weight Cardstock For Base Card
- Copic Markers
- Oval Nesting Die
- 8x8in Frosty Paper Pad
- Wet Glue
- Snowflake Dies
- Glitter


mercoledì 10 marzo 2021

Card "Capitan America...vola tra le stelle!" by Roberta Cercato - robyscrap


Buongiorno a tutti!!!
Questo mese ho scelto un supereroe... Capitan America e ho voluto creare una card un po' diversa dal solito. 

Di seguito un breve tutorial.

Per prima cosa ho stampato il digital stamp su carta adatta ai pennarelli ad alcool e l'ho colorato:

Step successivo, con delle forbicine ricurve ho ritagliato la sagoma:

Ho ritagliato un pezzo di cartoncino indicativamente della misura di 6"x 4";  fustellato delle sagome astratte e delle lettere, le ho attaccate sul cartoncino e ho spennellato con il gesso bianco:


Ho atteso che si asciugasse e poi con del gesso nero ho spennellato tutta la superficie:


Non ho atteso l'asciugatura, ma con una pezza ho tolto l'eccesso, ottenendo questo effetto:

Con i colori Opal Magic Art Alchemy di Finnabair ho spennellato qua e là:

Per richiamare i colori di Capitan America, ho ritagliato tre cartoncini metallizzati di dimensioni poco più grandi del precedente e li ho incollati uno sull'altro in quest'ordine: 

Ho aggiunto un sentiment e la mia card è pronta!


Spero che la mia interpretazione vi sia piaciuta,
ci rivediamo il prossimo mese con un altro progetto!

A presto,
Roberta


Elenco dei materiali utilizzati:

- digital stamp Capitan America

- cartoncino adatto ai pennarelli ad alcool

- pennarelli ad alcool Spectrum Noir in varie tonalità

- forbicine

- colla

- taglierina

- gesso bianco di 13@rts

- pennelli vari

- fustellate astratte su cartoncino

- cartoncino bianco acquerellabile

- cartoncino nelle tonalità del rosso, blu e bianco

- gesso nero Finnabair

- colori acrilici Opal Magic Art Alchemy di Finnabair nelle tonalità del rosa, azzurro e verde 


venerdì 5 marzo 2021

Ariel - tutorial by Sabrina Chicca Lamarina


 hello friends of the casetta  !!  today I keep you company with the tutorial of my card with the sweet protagonist Ariel

Ciao amici della casetta! Oggi vi tengo compagnia con il tutorial della mia card con protagonista la dolce Ariel


I used Ariel already digitally colored (on the Etsy shop, upon purchase you will receive both the coloring image and the already colored ones!).  I digitally created and printed the sentiment.  I cut out a few pieces of glitter paper and glued and assembled everything, inserting the chipboard under the sentiment banner to make it stand out.

Ho utilizzato Ariel già colorata in digitale ( sul negozio Etsy , all’acquisto riceverete sia l’immagine da colorare sia quelle già colorate!) . Ho realizzato in digitale e stampato il sentiment . Ho ritagliato alcuni pezzi di carta glitterata e ho incollato ed assembleato il tutto, inserendo del chipboard sotto il banner del sentiment per farlo risaltare . 


I cut out another piece of orange glitter paper and glued two pieces of chipboard and glued it underneath to create a relief ... I usually cut the underlying paper 1 cm more than the upper one, but in this case I have  decided to cut only a strip to build a raised and out of phase base of my card!

Ho ritagliato un altro pezzo di carta glitterata arancione ed ho incollato due pezzi di chipboard e l’ho incollato sotto per creare un rilievo ... solitamente ritaglio la carta sottostante sempre di 1 cm in più rispetto a quella superiore, ma in questo caso ho deciso di ritagliare solo una striscia per costruire una base rialzata e sfasata della mia card! 


Finally I created the dots with the Nuvo Tonic and I inserted two gold sequins next to it and my card is ready !!

Infine ho creato i dots con i Nuvo Tonic ed ho inserito accanto due paillettes color oro e la mia card è pronta!!


I used:

Paper
Glue Nuvo 
Nuvo Crystal drops 
Chipboard
Pailettes/ sequenza gold 

Xoxo 


mercoledì 3 marzo 2021

Chicca Wood by Il Mondo di Ross

Buongiorno a tutti voi, questo è il mio primo progetto per questo blog, con cui mi presento a fare parte di questo team ,ringrazio innanzitutto Sabrina per avermi invitata per questa collaborazione, ne sono molto felice!


Ho scelto come protagonista della mia creazione il bellissimo timbro Chicca Wood della nuova release di questo mese, che potete trovare qui

Come prima cosa ho stampato il timbro su carta per pennarelli ad alcol,per la colorazione ho scelto i pennarelli nuvo.
Ho finito di colorare il timbro digitale 
Dopodiché sono passata a creare un primo sfondo per la mia card, usando del cartoncino bianco su cui ho appoggiato lo stencil e usato tre tonalità di distress oxide ( lucky, pistacchio e peeled paint ) miscelandoli delicatamente tra loro

Oltre ad aver stampato il disegno del timbro, ho deciso di stamparmi anche quello già colorato ma di dimensioni decisamente molto più piccole.

Mi sono ritagliata tutte le sagome usando le forbici, ed ho deciso la disposizione da dare loro, incollandole con biadesivo spessorato.
Alla base della mia card ho messo carta patterned Craft Smith con disegno effetto legno.

Ho deciso il sentiment da usare ,che ho ritagliato a mano ed incollato ad un pezzettino di cartoncino bianco i cui bordi li ho sporcati con distress ink brown

Ho infine abbellito con qualche fustellata di piume e alcune paillettes in tinta verde.


Spero vi sia piaciuta la mia card, a presto 
Rossella - Il Mondo di Ross